Thursday 28 January 2016

Final Piece

For my final piece I have decided to move to human eyes as they contain more detail when compared to the animals that I have access to. Below is sketch of how I want the photo to look. The iris will be turned a dark blue/purple with a dark image of a tree within the pupil symbolizing our view of the environment. 

Here I have edited the one of the images of the eye.  In the first image I have increased the vibrancy and altered the levels along with the curves in order to bring out the colour in the eye. In the second image I have used hue and saturation to change the colour of the eye to purple to represent space. As these images where taken indoors I could not get enough light to focus correctly on the iris, because of this I am going to take a second photo shoot outdoors so that I can use a lower ISO and higher shutter speed.


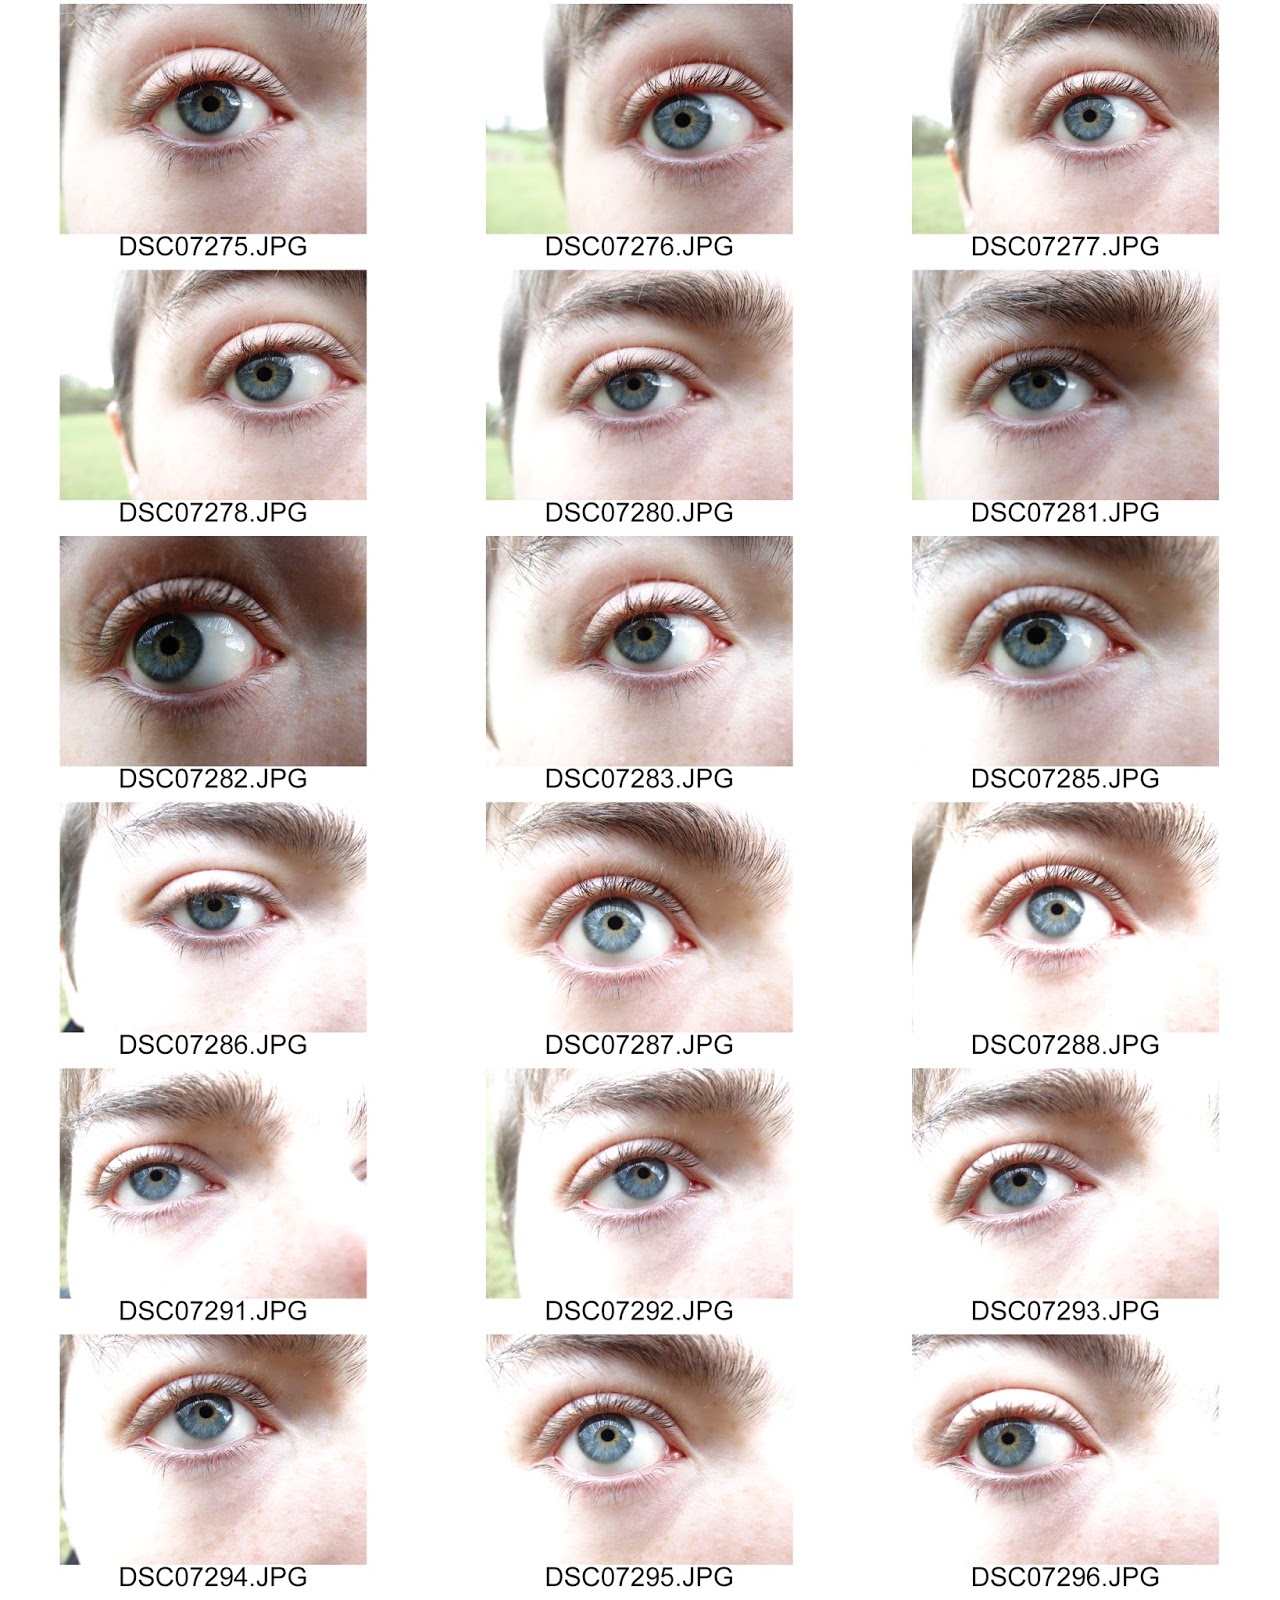
After my second photo shoot I feel that I have manage to capture the correct amount of detail within the iris. The three photos below are my favourite from the contact sheet as you can see the reflection of the landscape within the iris. To bring out the colours in the iris I have again vastly increased the vibrancy and slight levels altered the levels and curves.  


For my final piece I have photoshopped the image of a tree into the pupil as shown in the plan. To do this I used the pinch distortion tool on the tree so that it curved slightly with the eye and then place it over the pupil. I then lowered the opacity and erased it until it blended in correctly with its surroundings. I have also removed the body of the camera that could be seen in the reflection of the iris by using the paint brush and the spot heal tool.
The reason that I have chosen an eye for my final piece on the natural world is because of its complexity and as an attempt to represent how we see nature, our view on the world. I chose a tree to be the center piece of this image at it universally represents nature and the outdoors, as well as fitting in with the reflection of the landscape that can already be seen within the eye.

Monday 25 January 2016

Eyes - extended

Here I have taken more photos eyes this time focusing on a chicken which was being held while I took the photos. This allowed me to get much closer than I would otherwise of been able to get.
I have edited this photo in a very similar way as in the previous post by cropping it down, so that the eye is the main focus of the image. In addition to this I have again altered the levels and curves in order to increase the contrast. 

While editing I tried selective colour by eliminating all colour except for that within the eye, which I felt drastically changed the atmosphere form a bright and light-hearted into dark and eerie. I decided to remain with the original as although this has greater contrast I feel that the lack of colour takes away from the chickens identity 

Friday 22 January 2016

Suren Manvelyan

Suren Manvelyan is an american photographer who has focused on many areas of photography. Among his most popular topics are his photos of animal eyes and human eyes. This photo is of a black rabbits eye and is my favourite out of his animal eyes collection because of the soft tones and the amount of detail that he has managed to capture.
Here I have taken a selection of close up photos of both dogs and cats. I chose this photo from the contact sheet as it was the one where the eyes present the most detail.  When editing the image, I have cropped it down so that the eyes are the main focus and then altered the levels and curves in order to increase the contrast and make the eyes further stand out. 

In order to develop this idea further I will need to try get closer to the animals, as this was restricting the amount of detail that I could capture. I will also need to try and take photos of different kinds of animals as the detail and style of them can vary greatly.


Thursday 21 January 2016

Selective colour

  Selective colour is a technique frequently used in order to draw the focus of a photo to one particular point. For example in the photo to the left Ahmed Eslaid has made the entire photo black and white except for the flower which he wants to be the focus of the photo. This can be a very powerful technique as it can change the atmosphere of a photo completely.                                                                                                                              

For my attempt at selective colour I have decided to focus on animals as they often display bright colours that can contrast their surrounding. For these two photos in particular I made the both black and white before erasing the areas where I felt that colour would have the most effect. I have also altered the levels and increased the vibrancy to make them stand out even more. 


Thursday 14 January 2016

Polar Coordinates

This tiny planet has been made by Grant Wilson using polar Coordinates. This is done using a panoramic shot preferably of 360° like the one below but anything over 150° can work. The photo is curved around a central point creating a planet. 

I order to create a tiny planet I have taken a selection of panorama photos unfortunatlty my camera cannot take 360 degree panoramas so in this screenshot I have combined 3 separate photos in order to create on that is 360 degrees. From here I then rotated the image 180 degree and change the dimensions to make the image into  a square. From here I used Photoshop's inbuilt polar coordinates distortion tool.
 I feel that the major issue with this image is that the trees reach the top of the image, because of this they have been distorted. In my next attempt I will also have to ensure that they is nothing to close in the foreground as the polar coordinates effect has not worked well with the bridge that was in the foreground of this image.


This photo began as just under 180°. Here I have duplicated the image and inversed it. Unfortunately this will result in the planet being identical on both sides but the half's will link much smoother together.


Here I have rotated the image and altered the dimensions making it square so that Photoshop's polar coordinate effect will correctly produce a tiny planet. 


Thursday 7 January 2016

Panorama


Panorama has been around almost as long as photography. This done by showing a series of images next to each other in order to create one photo. One such photographer was H.H Bennett who could print three or four 20" x 24" sized negatives onto one enormous sheet of paper with almost no indication of where the negatives met. the photo below is one of his,of the Wisconsin river.


Using the panorama setting on my camera I have taken a number of photos shown above. The grey space of these photos indicates the maximum length of a photo, and can be cropped out of later photos.
I took this Panorama 1335 feet up, over the plains of Shropshire. In the composition of this photo I have used the rocks on the right to put the expanse of the fields into perspective. When editing this photo I used levels twice. The first was to bring out the contrast in the sky and the second, the colours in the fields. 

Wednesday 16 December 2015

Black and White Film


After trialing film photography with standard colour film, I have now used black and white film as it often provides a unique atmosphere to a landscape. I have really enjoyed the results of this photo-shoot due to the lines across the images particularly in this portrait image where I feel it adds character and age.It is almost as if this image is part of an old film. I have also been very impressed with it's ability to deal with direct sunlight, producing results nearly impossible to capture on a digital camera.