Wednesday 16 December 2015

Black and White Film


After trialing film photography with standard colour film, I have now used black and white film as it often provides a unique atmosphere to a landscape. I have really enjoyed the results of this photo-shoot due to the lines across the images particularly in this portrait image where I feel it adds character and age.It is almost as if this image is part of an old film. I have also been very impressed with it's ability to deal with direct sunlight, producing results nearly impossible to capture on a digital camera.


Tuesday 15 December 2015

Film Experiment


When looking at different artists and their take on nature photography, I decided to look into analog photography as the results can be so varied and provide a different perspective into a scene. There are also many who would argue that film still conquers digital in many aspects of photography such as for use in natural light as it is more forgiving when it comes to overexposure and can produce more effective highlights. 


This photo and the photos above were taken using standard 35 mm colour film. I am pleased with many of the results from this roll as they showed me how well film can capture natural colours with a relatively high dynamic range. I also like how film manages to avoid overloading to white in the bright sections of an image, providing a more realistic result than digital photography. This was my favourite photo from the group because of the colour palette displayed across the image and how the water creates a line cutting the image into two sections.

Sunday 1 November 2015

HDR

Gustave Le Gray
HDR stands for high dynamic range and has been used within photography since as early as the 1850's. HDR is the idea of using several exposures in order to create a one image for example Gustave Le gray would produce seascapes with a high dynamic range by using one negative to capture the sky and then another with a longer exposure in order to capture the sea and then would combine these into one positive. I have decided to incorporate HDR into some of my landscape photography to help make the sky exposed correctly against the rest of the photo.


In order to try and create my own HDR image I have decided to try three different methods. The first is by using the HDR setting on my camera, the next is to use Photoshop's HDR toning adjustment to try and create the effect and last to combine two separate images of where the sky is correctly exposed in one and the land correctly exposed in the other in produce the effect. This will help me to which results in the most aesthetically pleasing photo.


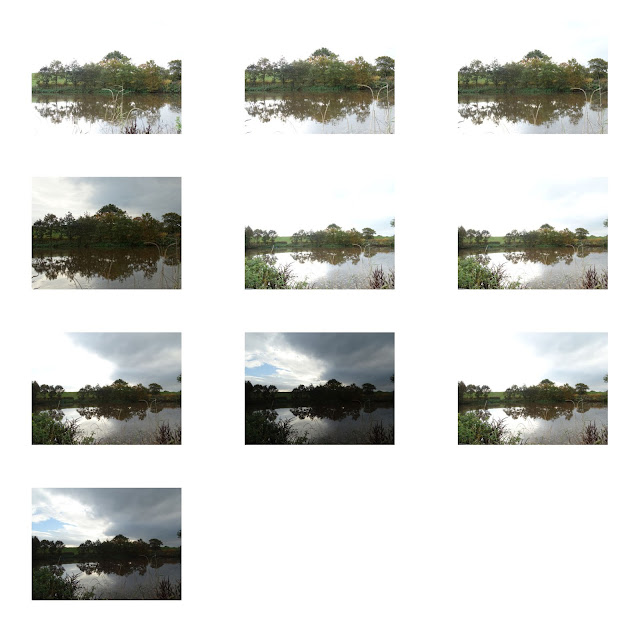
These photos were taken using the HDR setting on my while using a tripod to ensure there was no movement between exposures. I choose this photo off the contact sheet so it will be earlier to compare it too the other methods later on. 
I do not think that this photo has turn out as well as the last because as there was not much detail in the sky on the original the HDR toning connot correctly expose the sky.

  These two photos off the contact sheet above were taken in the exact same spot with on high and one low shutter speed to expose the sky and land separately. To combine them I layered on on top of the other and used the erase tool to reveal to desired aspects of each photo.


This is the photo after combining the two above and I feel that this method worked the best out of the three I tried as I had the most control over the end result.

Artist research photos


I took these photos in the style of Charlie Waite by combining aspects of the two of his photos that I looked at in detail. I have used a portrait orientation in order to allow the viewer to work through the photo vertically. Below I have edited the image by altering the levels to increase the vibrance while trying to keep the smooth transition between colours displayed in Charlie Waite's work. I have also altered the sky to add more depth to the image by taking the sky of one of the other images I took that day and fading it in, with the colours enhanced.


Saturday 31 October 2015

Charlie Waite - artist research

Charlie Waite is an established landscape photographer born in 1949. He worked in British theater and television before deciding to try his luck as a photographer. His work has been exhibited all around the world and he is also the owner and founder of light and land a company set up to provide photography workshops and tours. the main reason I have decided to research him is because of how his images seem to connect with nature displaying it as calm and soft.


I particularly like this photo because of the smooth transition between the trees and their reflection in the water. the entire image is in focus however it all seems to resolve around the central tree and disperses outwards into the distance.


I choose to also look at this image as I like how it makes you work through the photo vertically. this photo was taken using a film camera on skyscraper format with 120 roll film. another key reason that I choose this photo is because it again emphasises a smooth transition between colours due to the mist fading them in and out.

Tuesday 13 October 2015

Jereon Stel - Emulation

This image was taken using a 1/2 second exposure time with an ISO of 80. I choose these settings as the mist was causing the photos to become grainy so using a low ISO reduced this and the slow shutter speed retained the brightness of the image. Unfortunately this photo is not as close to that of Jereon Stel's as I could not find a landscape similar to where his photo was taken. I have increased the blues in this image but as this it made the image appear very artificial this is as far as I decided to alter the colours in order to create the chilling feeling produced by the work of Jereon Stel. 


Thursday 8 October 2015

Damon Clarke - Emulation


To recreate Damon Clarke's original image I have taken photos of a leaf with the sun as back lighting. For this photo I have used a aperture of f/8 to capture the detail across the image as well as an ISO of 80 to counter act the sun however this still left the image much brighter than the image I am trying to emulate.
This is the final image after I have edited it. I have altered the colour balance as well as healing the hole in the leaf in order to bring it closer to the target image. In addition I have also altered the levels to increase the contrast which brings out the veins in the leaf and added a vignette to darken the edges leading your eyes to the brighter centre.

Tuesday 29 September 2015

Damon Clarke - Emulation Plan

This photo was taken by Damon Clarke and focuses on the intricate details of a leaf using the sun to highlight it from behind. I have chosen to emulate this photo as it delves further into how macro can be used to give a different perspective on nature.
To recreate this image I would need to use a macro lens focusing on the majority of the image therefore would require a low aperture of at least f/8. This photo may also require using a high shutter speed to counter act the sun behind the leaf

Jeroen Stel - Emulation Plan

This photo is part of Jeroen Stel's blue collection. It was one of the photos I featured earlier in my conventions power point and I have decided to emulate this photo because of the blue filter which emphasizes the cold of winter.

To recreate this image I am going to need a camera preferably using a 50-200mm lens with an aperture of around f/8 to maintain focus throughout the photo. As well as tripod to steady the image. I will also need to edit the photo in Photoshop to create the same cold atmosphere as the original.

Monday 28 September 2015

Macolm Farrow - Emulation

Contact Sheet:
Chosen Photo:
I choose this photo out of the photos above as I feel it has the closest resemblance to Macolm Farrows work. For this photo I have used an aperture of 4 recreate the same depth of field as is present in the original image while using exposure time of 1/200 sec and ISO of 500 to compensate for the aperture, which increased the brightness of the photo.

Below I have edited the image to further resemble Macolm Farrows by rotating it to portrait as well as altering the colour balance and the levels which increased the contrast bringing out more colours in the background.

Thursday 24 September 2015

Malcolm Farrow - Emulation Plan

Malcolm Farrow is photographer based in Suffolk. His work many focuses on coastal scenery and wildlife. I have chosen to emulate the photo on the right as it displays many of the common wildlife photography conventions such as blurring out the background in order to draw all attention to the subject of the photo.
To recreate this image I am going to need:

  • A camera preferably using a macro lens and and a large aperture of around 2.8. A low ISO to prevent a grainy image.
  • A tripod to steady the image.
  • A butterfly in a green natural surroundings. 


Monday 14 September 2015

My Pinterest Board


My Pinterest board contains some of the inspirational photos that I have come across to try and provide me ideas for my own images.


Wednesday 24 June 2015

Henri Cartier-Bresson

Born on the 22nd of august 1908 Henri Cartier-Bresson grew up in Paris and bought his first camera when he was 24 and spent the next few years traveling across Europe as well as an expedition to mexico. During the war he joined the 'film and photography' unit and he where he was taken prisoner by Germans. He managed to escaped on his third attempt. after the war he worked as a professional photographer until he stopped at the age of 66 in order to focus on drawing. Henri works were mainly focused on street photography however this image is one of his few landscapes and I choose it because of the composition. He has kept the largest focus point, the Eiffel tower, in the right hand third as to to show the scale and magnitude of it's presence.  


Monday 22 June 2015

Andreas Gursky

Andreas Gursky born on the 15th January 1955 is a German visual artist known for his large format architecture and landscape color photographs. Gursky broke the world record for the most expensive photograph ever sold with Rhein ll. It like many of his photos was larger than average photos, His process involved shooting chromogenic prints with film, using a large-format 5 × 7-inch camera; he scanned the images and digitally edited them on a computer. Rhein II was 5 × 10 feet. The unique compositional strategies of his photos have resulted in images that walk the line between representation and abstraction. 


Rhein ll
I feel that he reason why this photo was sold for such a large sum was because of it's simplistic and abstract look. Another reason is because of the editing that he did to change this from the original which would of involved houses on the horizon. this means that it would be very hard to get a photo to look exactly the same. 


I took this photo in the style of Gursky by using horizontal lines to split up the photo. I edited it in photoshop using the warp tool in order to get the horizontal lines straighter. I also edited levels to increase the contrast and vibrance to increase the intensity of the background.

Harold De Puymorin


Harold de Puymorin was originally from Toulouse France and is now living in Hong Kong, he has always been deeply attracted by colours, shapes, and the rich visuals that Asia has to offer. Whether he is using classic photography or more advanced digital techniques, his works presents an original yet artistic vision of life.With his special fascination with geometric shapes, vibrant colours and sometime humorous scenarios. Harold de Puymorin transforms reality into the abstract and unconventional shapes and compositions which we see in his photos.


This photo is a good example of his love for colours and how he uses them in order to convey his images in an abstract manor. This photo is also similar to the work of Andreas Gurksy, which also focuses on abstract lines however his photos mainly look at horizontal lines rather than vertical.


Mess
This image is similar to previous one and has been edited in order to give the appearance that they are converging towards the centre of the photo. This photo would of been taken using a high aperture to get the whole photo in focus. 

Tuesday 16 June 2015

Steve McCurry

Steve McCurry was born in Philadelphia, Pennsylvania. He studied film at Pennsylvania State University, before going on to work for a local newspaper. When McCurry made his first of what would become many trips to India he went around with little more than his clothes and his camera. After much traveling he found himself crossing the border into Afghanistan where he brought the world it's first insight into the war going on there. He has since been all over the world and received multiple prestigious awards for his work.


In this photo he has used a very high aperture such as f16 in order to get the both the foreground and background in focus. It is also under saturated which makes the light that is being cast into the valley more prominent. His use of the broken wall in the foreground also makes the valley seem more distant and just out of our reach.


In this photo Steve mcCurry has also used a high aperture and a low shutter speed which has caused the person to be slightly out of focus. i also like how he has not waited for the people to leave the shot before taking the photo which makes it seem more natural.


Sunday 14 June 2015

Ansel Adams

Ansel Adams was an american photographer best known for his photos of the American west and exspecially yosemite national park. Adams professional breakthrough followed the publication of his first portfolio, Parmelian Prints of the High Sierras. The portfolio was a success, leading to a number of commercial assignments. Between 1929 and 1942, Adams’ work and reputation developed. He achieved financial stability from selling over one thousand unique prints of the moon rising above a village taken just before the attack on peal harbour.In his later life s photography became more popular his work began being shown in museums and gallery's.
Golden gate before the bridge


In this photo you can see how Ansel Adams has used black and white to emphasis the shapes and contrast between the edges of the zones within the photo. He has also taken up two thirds of he photo with sky, this leads to the very vast and open feeling that this photo has.


Tetons and the snake river


This is one of Ansel Adams more famous photos. In this photo you can really see the different zones within the landscape. I feel that this photo benefits from being black and white as it keeps it uncluttered from colour and emphasises the textures . I also find it remarkable how he managed get everything just right when he only had a limited number of negative plates.